0:00
Hey, what's up guys, Steve from Cult of Mac here with a quick Pixelmator app tutorial
0:05
Pixelmator is a fantastic photo editing app available on iOS and Mac, and one of its coolest
0:11
features is being able to clone quickly and easily. So in today's video, I'm going to show you how to clone objects and people within
0:18
the iOS app. So let's get started. Pixelmator does a whole ton of things, but one of the best is the magic it can create
0:26
with its cloning tool. It won't make you any new humans based on your own DNA, sadly, but it will let you
0:31
take one part of your picture and add it to another part of your picture as often as you like
0:36
First up, fire up Pixelmator on your iPad and tap the plus button to create a new image
0:42
Choose a photo from your camera roll and let Pixelmator bring it up on your iPad screen
0:45
Next, tap the paintbrush icon in the upper right corner of the screen, then choose retouch
0:49
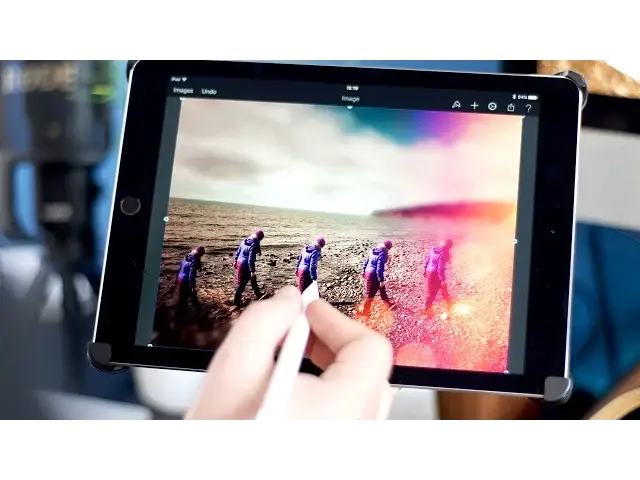
from the tools menu. Then tap on clone to paint with a sample of an area in your photo
0:54
Drag the selector tool in the centre of the circle and move it to the object or area in
0:59
your photo that you want to copy. Adjust the size of the cloning tool selector with a tap on the fraction in the upper right
1:04
and you'll get a clone settings drop down menu. Drag the slider for size up or down to make the selection area larger or smaller
1:12
And drag the strength slider to the right to make your resulting clone more opaque or
1:15
to the left to make it more transparent. Now take your finger or apple pencil and paint on the screen in the location you want to
1:22
add the object you selected. Just wipe around the screen like you would a paintbrush and you'll paint with the area
1:27
you've selected before. If you've ever used the clone tool in Photoshop or a similar app, you'll find this very familiar
1:35
And you can do this indefinitely, all over the image if you like, to create some stunning
1:39
or just plain weird effects. When you've finished painting objects on your photo, tap the done button
1:44
You'll go back to the main editing screen in Pixelmator where you can continue to retouch
1:48
or edit the photo to your heart's content. Also try tapping on the paint icon again, but this time try tapping on the add effects button
1:57
You'll get an array of interesting tools like blur, vignette, light leaks and hue and saturation
2:01
filters that you can stack on top of each other with ease. Just tap on each one in turn and adjust the radial sliders, making your simple photo a
2:08
work of art. If you've got some unwanted artefacts from your cloning session, try adding some light
2:14
leaks or bokeh to your picture to help blend and hide any issues. Well, that's it for this video, but let me know in the comments down below if you'd like
2:22
to see more iOS photo editing apps covered on the channel. Also leave any links to your masterpieces that you've created using this tutorial down
2:29
below as I'd love to see them. If you haven't already, hit that like button if you enjoyed this video and don't forget
2:35
to subscribe so you don't miss a single video from Cult of Math. I'll catch you in the next one